Hôm nay mình xin chia sẻ 1 bài hướng dẫn cài đặt STM32F1 trên nền tảng IDE của Arduino.
1./ Đầu tiên các bạn vào mục File->Preferences

2./ Sau đó ADD thư viện vào ( như hình)
https://github.com/stm32duino/BoardManagerFiles/raw/master/package_stmicroelectronics_index.json
Link tải thư viện:https://github.com/stm32duino/Arduino_Core_STM32

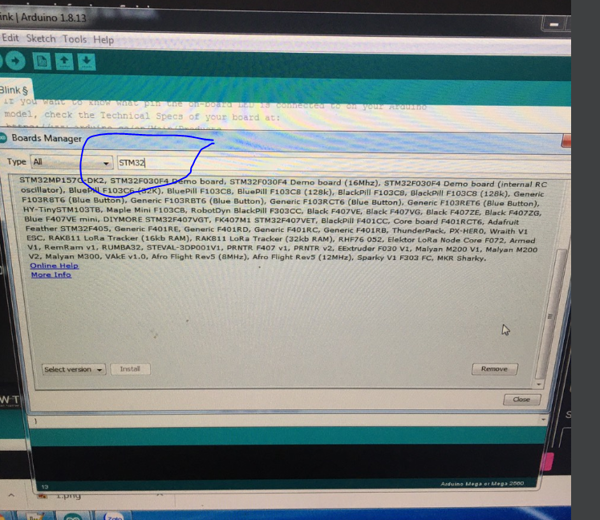
3./ Sau đó các bạn cài đặt thư viện cho STM32 ( gõ STM32)

4./ Sau đó các bạn mở Chương trình nháy led đơn giản
#define LED PD_10
void setup() {
// initialize digital pin LED_BUILTIN as an output.
pinMode(LED , OUTPUT);
}
// the loop function runs over and over again forever
void loop() {
digitalWrite(LED , HIGH); // turn the LED on (HIGH is the voltage level)
delay(1000); // wait for a second
digitalWrite(LED , LOW); // turn the LED off by making the voltage LOW
delay(1000); // wait for a second
}
5./ Các bạn dùng Mạch nạp ST-LINK V2 và cài phần mền driver cho nó
Sau đó các bạn cài đặt phần mền STM32CubeProgrammer để nạp code
Trong mục Arduino chọn STM32CubeProgrammer
